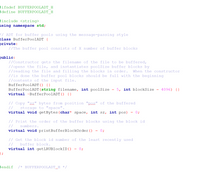
Implement and demonstrate a disk-based buffer pool class based on the LRU buffer pool replacement strategy. Disk blocks are numbered consecutively from the beginning of the file with the first block numbered as 0. Assume that blocks are 4096 bytes in size. Use the supplied C++ files to implement your LRU Buffer Pool based on the instructions below.
- Implement a BufferBlock class using the supplied BufferBlockADT.h
- Your Buffer Block must inherit BufferBlockADT or you will not get credit for your work.
- All BufferBlockADT virtual functions must be implemented in BufferBlock
- Block Size: 4096 bytes
- Add an instance variable to your buffer block implementation to store the block id; i.e., “int blockID.”
- Implement a Buffer Pool by inheriting BufferPoolADT (BufferPoolADT.h) – implement all of BufferPoolADT’s functions
- Your buffer pool should consist of 5 buffer blocks
- Your buffer pool should manage the buffers using the LRU strategy
- Your buffer pool should be named LRUBufferPool and the file containing the LRUBufferPool class should be named LRUBufferPool.h
- Use the provided main.cpp and the included test file mydatafile.txt to test your program.
/* Assuming you initialize your buffer pool with blocks 0-4 and
* open the test file as a binary file, your output for the first
* three tests (file position 5030, 16500, and 24640) should look
* like the following:
*/
My data for block 1 is: "ment all o"
My buffer block order from most recently used to LRU is:
1, 0, 2, 3, 4,
My data for block 4 is: "e for the "
My buffer block order from most recently used to LRU is:
4, 1, 0, 2, 3,
My data for block 6 is: "ent a Buff"
My buffer block order from most recently used to LRU is:
6, 4, 1, 0, 2,
![E#include "constants.h"
#include "LRUBufferPool.h"
using namespace std;
Bint main() {
//initialize buffer pool
LRUBufferPool* bp = new LRUBufferPool("mydatafile.txt", POOL_SIZE, BLOCKSIZE);
//get data from the buffer
char* data = new char[10];
bp->getBytes (data, 10, 5030);
printchars(data, 10, 5030/BLOCKSIZE);
bp->printBufferBlockorder ();
/*Output should be something like the following:
My data for block 1 is: "ment all o"
My buffer block order from most recently used to LRU is:
1, 0, 2, 3, 4,
//re-initialize the char array and get the next block of data
initializecharArray(10, data);
bp->getBytes (data, 10, 16500);
printchars (data, 10, 16500/BLOCKSIZE);
bp->printBufferBlockorder ();
/*Output should be something like the following:
My data for block 4 is: "e for the
My buffer block order from most recently used to LRU is:
4, 1, 0, 2, 3,
*/
//re-initialize the char array and get the next block of data
initializecharArray(10, data);
bp->getBytes (data, 10, 24640);
printchars(data, 10, 24640/BLOCKSIZE);
bp- >printBufferBlockorder();
/*Output should be something like the following:
My data for block 6 is: "ent a Buff"
My buffer block order from most recently used to LRU is:
6, 4, 1, 0, 2,
* /
//re-initialize the char array and get the next block of data
initializecharArray(10, data);
bp->getBytes(data, 10, 28700);
printchars (data, 10, 28700/BLOCKSIZE);
bp->printBufferBlockOrder ();
//re-initialize the char array and get the next block of data
initializecharArray(10, data);
bp->getBytes(data, 10, 16600);
printchars(data, 10, 16600/BLOCKSIZE);
bp->printBufferBlockOrder ();
//close program
cout <« endl << endl;
system("pause");
return 0;](https://content.bartleby.com/qna-images/question/546860fe-98c5-4cbb-83c9-6bb3ac138cc4/365fb89c-0a25-4809-96d7-a6834fb36f49/em6sr3a_thumbnail.png)

Trending nowThis is a popular solution!
Step by stepSolved in 2 steps

How do you implement the BufferBlock class and the LRUBufferPool class?
How do you implement the BufferBlock class and the LRUBufferPool class?
- A client with a completed main function is provided. The main function should not be modified. You must update the client by creating and implementing the various functions described below. readFile – Loads the parameter array with Billionaire objects. The data for each Billionaire is read from the given data file which is in CSV format (comma delimited - 1 line per record with fields separated by a comma.) The function should read each line from the file, pass the line read to the Billionaire class constructor and store the resulting object in the parameter array. The second parameter represents the maximum number of Billionaire objects that can be stored. displayAll - Displays a list of the Billionaires stored in the array. getRange – Determines the smallest wealth value and the largest wealth value within the array. These values are returned to the caller via reference parameters. getWealthiest – Returns the Billionaire within the array with the greatest wealth. getUS –…arrow_forwardWhen you compile and run packaged software from an IDE, the execution process can be as easy as clicking a run icon, as the IDE will maintain the classpath for you and will also let you know if anything is out of sorts. When you try to compile and interpret the code yourself from the command line, you will need to know exactly how to path your files. Let us start from c:\Code directory for this assignment. Consider a java file who's .class will result in the com.CITC1318.course package as follows: package com.CITC1318.course; public class GreetingsClass { public static void main(String[] args) { System.out.println("$ Greetings, CITC1318!"); } } This exercise will have you compiling and running the application with new classes created in a separate package: 1. Compile the program: c:\Code>javac -d . GreetingsClass.java 2. Run the program to ensure it is error-free: c:\Code>java -cp . com.CITC1318.course.GreetingsClass 3. Create three classes named Chapter1, Chapter2, and Chapter3…arrow_forwardwhat is needed to be solved: Execute the rectangle class with some modifications: - add color ------> setter and getter then upload the source files and screenshoot of the run ////////////////////////////////////////////////////////////////////////////////// this is a header file: /// Specification file for the Rectangle class.#ifndef RECTANGLE_H#define RECTANGLE_H /// Rectangle class declaration. class Rectangle{ private: double width; double length; string color; public: void setWidth(double); void setLength(double); void setColor(string); double getWidth() const; double getLength() const; string getColor() const; double getArea() const;}; #endif ///////////////////////////////////////////////////////////////////////////////////// this is a cpp file: // Implementation file for the Rectangle class.#include "Rectangle.h" // Needed for the Rectangle class#include <iostream> // Needed for cout#include <cstdlib>…arrow_forward
- in C++ answer the following question in the image :arrow_forwardYou shall implement a Microshell, “MSH”. MSH shall provide the following functions: Provide a shell-like interface for launching new programs: When MSH starts running, it will print a prompt "cssc0000% " (replace cssc0000 with your username) and then wait for the user to type in a file name. Note, MSH will NOT have any shell built-in functions (such as cd, setenv, printenv, bg, fg, etc), with the exception of #5 (below). When the user enters a filename and hits the “enter” key, MSH then reads the filename entered and determines if the file is an executable file. If it isn't, MSH will print a useful error message to the user and then return to #1 above (display a new prompt and wait for user input). If it is an executable file, then MSH will create a new process and run this program in the new process. Note – you will need to determine whether the filename is a fully qualified path name or if the file needs to be searched for (fully qualified pathnames begin with a slash (i.e. "/"),…arrow_forwardImplement a blog server in C 1. Implement get of all posts (GET /posts), and individual post (GET /post/1) 2. Implement creation of post (POST /posts). Allow the user to enter their name, but check that they are a valid user in db. Do error checking! The user should not specify the post id; that should come from the database. 3. Write three html files to test this; serve them with the blog server: index.html shows the list of posts with a link to each. post.html shows a post. publish.html allows the creation of a new post. Link these together as a user would expect!arrow_forward
 Database System ConceptsComputer ScienceISBN:9780078022159Author:Abraham Silberschatz Professor, Henry F. Korth, S. SudarshanPublisher:McGraw-Hill Education
 Starting Out with Python (4th Edition)Computer ScienceISBN:9780134444321Author:Tony GaddisPublisher:PEARSON
 Digital Fundamentals (11th Edition)Computer ScienceISBN:9780132737968Author:Thomas L. FloydPublisher:PEARSON
 C How to Program (8th Edition)Computer ScienceISBN:9780133976892Author:Paul J. Deitel, Harvey DeitelPublisher:PEARSON
 Database Systems: Design, Implementation, & Manag...Computer ScienceISBN:9781337627900Author:Carlos Coronel, Steven MorrisPublisher:Cengage Learning
 Programmable Logic ControllersComputer ScienceISBN:9780073373843Author:Frank D. PetruzellaPublisher:McGraw-Hill Education


